Wednesday, May 15, 2013

No News Is Good News.


Ironing strips

My apologies for my long delay in checking in, however the time away has been well-spent. Progress is being made.   Slowly the dungeon is getting whipped into shape.  I've been going through more boxes and getting rid of fabric I know I will never use, which has been wonderful.  Freeing up boxes and more importantly space to allow for the existing fabric to flex and flow into the space.  It's liberating to allow myself to "throw away" fabric. 

Checking in on the Bonnie Hunter Scrap Users Project:

Less than 12" strips destined to be squares and bricks
 So far I am done with the 1.5" condos...all sixteen of them! I went through and took out the less than 12" strips and cut these into squares and bricks. I opted not to sort them by colour, only by size. The 2" condos have been started. 

Fleece:
No changes at this time, just finding more and more bits and pieces and trying to get them corraled.
Cotton:
No real changes, just keeping up with what is being found.  I pinned a couple quilts and rather than toss the scraps on the pile, I went ahead and cut them into the proper widths.  Good for me.

Stuff:
Managed to sort out my thread into hand quilting, sewing thread (vintage and new), embroidery thread and specialty threads.  It's great to go to the shelf and get exactly what I need without having to tear the house apart.  The rewards make the work to get to this point so much richer.

**** The pressing table has been created! ****

BEFORE

AFTER


I decided to sacrifice a solid wooden table and attach one of the leaves to make the topper long enough to cover the space. I used an acrylic blanket covered by a wool blanket to create the cushioning for the ironing board.  This was covered with a large piece of canvas washed but not dried to be folded under on the edges.  The entire thing was ironed until dry and I am pleased to share that this surface is PERFECT for laying out quilts, pinning, ironing and it's a great staging area for sorting stuff.  I delight in ironing on it everyday!


Throughout this whole process I am learning a lot about myself and my collecting tendencies.  For those who know me, I hail from the school of "Waste Not Want Not" and have the genetic predisposition for being a collector/obtainer.  Mostly because this behaviour is constantly reinforced by people asking me if I have a this, that or another and usually I do.  As a part of this whole process I have come to the conclusion I have entirely too much shit and too many hobbies.  But, what can you do? Life is too short not to enjoy it.
Each day I try to do a little, and after a while it really adds up to something big! 

Peach Out, Apricots.
heart, Morg


Sunday, January 20, 2013

All Plaid Raggedy Fun!


 My mum dug her plaid raggedy quilt so much she asked me to make more.  This fun quilt was made from 7" squares and sewn together with an inch wide open seam to allow for the edges to be nipped.  When washed the edges fray and give the characteristic raggedy quilt look.

Detail of colours

These type of quilts are fast, fun and easy to do.  I think it took me longer to choose the colour pattern than it did to actually sew and snip!  I love the way this quilt came out with the playful sprinkling of reds and blues with a surprise of purple in the middle.

Back of quilt
 The backing fabric was made from an incredible deal I got on a seventeen yard roll of this wonderful grey and fushia flannel.  It's fun and funky and gives an unexpected snap of colour.
Vital Stats:
Approximately 36 x 60 inches finished.
Squares: 7"
Fabric: Flannel
Completed: Summer 2012

Quilt for Caroll

Springing into Fall
When my neighbour Caroll told me she was having a baby I said cautiously, "Is a congratulations in order?" 
She smiled widely and said, "Yes.  Very unexpected, but very much welcomed."   

 Colours of Fall
Caroll's favourite time of year is Halloween.  She plans for the magic of Samhain all year.   I designed this quilt to play with the colours of the season, to play on nature and complement Caroll's love of plants.
Back of quilt

Leaf it to me

Which witch is which?
When I first met Caroll Patten she told me she was a practicing witch.  I told her I was a professional bitch and we should get along just fine.  I found this fun "prim" fabric and immediately thought of Caroll.  One of the few times when I made my own binding.  I am pleased with how it turned out.

We spent many hours talking over the fence, under the pear tree. 

Our dogs were the best of friends.  Her little Shih Zsu, Wicket and my Xolo, Remus.  They would chase and sniff and water and chase and run and sniff all over each others yards.   

Sadly, that all ended when Caroll and her husband, Laramie moved away in the fall of 2012.  I am not sure where she is living now, or if she has had her son, Kelly Theodore, but I hope they are healthy, happy.  I hope Kelly likes his quilt, each stitch was made with love.
 

Vital Stats:
Approximately 46 x 37.5 inches finished.
Stitch Per Inch:  body 4, binding 4


Batting Type: Cotton (Warm and Natural)
Binding: Made by Morg
Fabric: Scraps from lots of different places, lots of different sources.
Completed: Late Summer 2012


I miss you Caroll and Remus misses Wick. 

Hugs. 

Operation Dungeon Do Over - January update

As promised, pictures:

Greens ready for trimming.


 Progress is coming along, across the top of the shelves are the more than a yard cuts.  These have been organised by colour or colour group depending on the amount of fabric.  I was pleased to find these file boxes at WalMart for a reasonable price.  They will serve me well. 


 My table is a mess in this picture but you get the general idea of where I am going with this mess.  The pop up laundry bin on the left is where I dump my scraps and when the polyester bag is full I sew it up and instant pet bed!


 The future pressing table is still a mess with stuff accumulating on it all the time.  It will eventually be cleared off and a large piece of lumber will be added.  I will probably use duck or canvas for the ironing surface and use some type of material for the padding, not sure yet, but when I get there I'll know what I need. 

 
Update Reports:

Fleece - I'll start with fleece today as there has been a little progress but nothing more than rehousing.  I am using the "special boxes" for fleece and after this past weekend have enough to contain all the cut stuff!  This is great!  I now have all the main cuts in labeled boxes even the mice and wedgies.  At last!
Organised Chaos.

Cottons - I just finished the Bin of Greens.  The bins are a group of plastic cat litter containers designated to hold my strips and scraps when I first started obtaining such fabrics from friends and strangers.  The number of bins expanded to about eighteen and now four remain unsorted.  With the completion of the reds I am going to tackle the greens.  I started presorting these into three piles:  more than a foot, less than a foot, bits and pieces.  Bits and pieces go straight into the trays for the applique scraps.  Less than a foot get subdivided by width and then get cut into bricks and squares.  More than a foot get divided by width and then are put away in the appropriate colour condos.


Still in progress is The Bonnie Hunter Scrap Users Project.  This is my official label for the process of going through the cut/sorted strips and making them into easily usable pieces.  As I break from bins and other organising I go through the cut strips and pull out the pieces that are shorter than 12" and cutting these pieces into squares and bricks (2x width in length).  So far I've completed the pinks and purples in all 4 widths.


Charms have been divided up into bins by colour groups.  The single box was bursting at the proverbial seams so it had to be done.  I am steadily filling these boxes as I work my way through the colour bins. 


It is such a delight to work through this organisational process.  As bins are emptied and banker boxes pile up in the corner I look at the work I've accomplished and smile.  Things are coming together "sew" very nice and neat.  

 Guess that is about it.  Hoping to get some more pet beds made with the confetti left overs.  I have plenty of polyester waiting to be repurposed!  ;)

Confetti leftovers destined for pet beds.
Peach out Apricots.
heart, Morg

Monday, December 31, 2012

2012 and the End of Days.

Okay, so 2012 didn't end on the 21st of December like the Mayan Oreo calendar would have suggested.  31 December does bring an end of my creative year and ushers in a new beginning full of promise and things to come!

In the month of December Operation Dungeon Do Over has been successfully embraced and I have managed to weed through all the cardboard boxes of cotton fabrics!  The contents of which have been measured, labeled, folded, cut or otherwise started in the "process."   I do have an abudance of fabric left to be cut and put into their respective shoe boxes according to strip width, but the greater lengths have been appropriately assigned to their proper containers. 

Cleaning last night revealed several hidden caches of stashes.  Including a cache of cotton strippets and bits of stuff that were promptly sewn into a couple pet beds.  Another cache revealed a generous helping of fleece confetti which is destined to become even more pet beds!  The big surprise was a bin full of cotton fabric waiting to be organised into my new system. I consider this the perfect opportunity to test my new system.  I still have the colour bins to sort through and repurpose, but there is light at the end of a long, dark, fabric tunnel.

Plans for 2013
Tame/Train the Fleece beast.
Cut less than 12" strips to usable sizes per Bonnie Hunter Scrap User's System recommendations.
Continue to process fabric as it is discovered/comes in.
Continue to organise The Dungeon into a usable environment (keep studying Teresa Rawson's space).
Get over my thing about Triangles.
Learn to do applique!
Learn to paper piece!
Learn to free motion quilt!
Blog more!
MAKE MORE QUILTS!

Slowly, as my Dungeon is being molded into a place I want to work and be creative this will be a good learning experience and a chance to grow and develop into the quilter I want to become.  In the meantime this will be a long, slow path full of trials and errors, but in the end it will prove to be a wonderful journey and one for which I will be proud.

Peach Out, Apricots! 
Morg

Tuesday, December 18, 2012

Progress Report


Sorting 2.5" strips.  Oh my!
Wanted to let you know that I have been making outstanding progress.  I will load before/during/after pictures, I promise.  This is one BIG project.  It's hard to believe how much progress I've made in just a short time.

News on the Cottons:
I have now gotten the strips (cut according to the Bonnie Hunter Scrap User's System suggestion of: 1.5, 2, 2.5 and 3.5") into their own shoe boxes.  Each set of strips are divided into 12-14 different colours.  (A BIG thank you to Teresa Rawson from Fabric Therapy) Each set of strips goes on a different shelf making it easy to keep them all organised. 

FQ condos on top,  1/2 Yard Condos on the next shelf down. 
As you can see the fabrics are just moving in and getting settled.


A view of the condos.

Charms which are 5x5" squares are starting to create their own space as I manage to weed through the colour bins.  I am sure this selection will grow with time.   And will start asking for their own little colour coded condos.

Fat Quarters, Half Yards, Yards have all been set up with shoe boxes (I refer to them as "condos" similar in number/design as the strips.

Soon I will be processing scraps which I think I have determined to be anything smaller than 1.5 wide down to a postage stamp or so in size, and all the other odd shapes and bits and pieces that will not otherwise fit into my existing series of shoe boxes.  My friend does applique and I want to learn about it so this will be a fine opportunity to give these scraps a purpose other than filler for my pet bed.

Fabric that is about 1.5 yard 1 yard + 6" and larger are being measured, tagged, bagged and go in a bin.  These lengths usually end up as backing fabric so it's best to have them in big bins.  I am trying to keep the bins to a manageable number so I am dividing them up like this: 
Yellow/Orange/Red,
Blue/Green/Brown,
Purple/Pink/Violet,
White/Cream/Black,
Light/Med/Dark Brights (this one might get split if it gets too full! I LOVE colours!)
Batiks/Plaids

Report on Fleece:
Some of my fleece has been cut into fat quarters.  These are being folded and put into an "underbed storage" unit which is a long flat plastic container.  I don't know the actual dimensions, but I have three of these and I can get a LOT of FQ fleece in them.   Correction - these are going into sterilite containers that are like file boxes with slightly curved lids.  Not to be confused with the less expensive, much more easily obtained flat top file boxes also made by the brilliant minds at Sterilite.  :)

Other fleece has been processed into 9x11 inch pieces, others into 6" squares.  There are circles and wedgie shapes and of course an abundance of bits and pieces.  I will need to obtain a couple more boxes to accommodate the bulk of the fleece, but then we should be set.

Christmas was an excellent opportunity to spread the love and fleece and cheer.  I was able to make a delightful dent in the yardage in the fleece closet.  The blankets were wonderful and well received. 

Update on Batting:
Not much, yet.  Working on a good storage system and how best to manage the scraps from projects past.

So that's what's up in the Dungeon.  Until next time...
Peach out, Apricots
heart, Morg

Tuesday, November 20, 2012

When the Going Gets Tough, the Tough Get Organised!

As with all things, the gears of inspiration need to be oiled.  My latest attempt at restimulating the seemingly frozen gears of my creative ebb and flow has been to pick up where I left off in organising my sewing room.  I recently felt the need to see who was doing what in the world and found this blog:  Fabric Therapy.  Do a search for "Stash Organizing" and you will see the most incredible series of tips on how to tame the Stash Beast. 

I had started my reorganising project earlier in the year with my entire basement in mind.  From the images here you can see that I have done an okay job in getting stuff organised.  I almost wish I had pictures from before I started.  My sewing dungeon was crazy horrible.  It looked like an episode of Hoarders.  Okay, not quite that bad, but it was pretty bad.  I did manage to force some order out of the chaos that is my fabric stash.  Most of it is safe from the creepy crawlies that share my subterranean space.  I did manage to get some space in the Studio organised as well.  The Lab, not so much, but it's a big job and I am still not quite positive what I want to do or how I wish to deal with it as it holds more than just paint and horses...there's more...so much more...  I shudder to think about how I want to deal with this space.

As luck would have it, finding the Fabric Therapy site inspired me to renew my efforts to get things organised.  This time I would focus specifically my Sewing Dungeon and eat that elephant first!

Presently I am working on the fat quarters/half yards.  So far I have gone through four boxes and redistributed these into thirty-two shoe boxes.  Sixteen for each size as the shelving space allows for twelve to sixteen boxes depending on the type of box.  This starting point has helped immensely in getting the fat quarters all in one place and neatly divided up.  The expandability of the system is great as my various yardage gets cut down/used up or I obtain more fabric (which I am still on a self-imposed fabric buying moratorium two years and counting).  The half yards will be sorted in much the same way as the Fat Quarters.  The plan is to do the single yards in much the same way using shoe boxes if possible or if I must, go to a deeper/larger box.  By doing this it will get the fabric where I can see it and when I am ready to create I don't exhaust myself hunting through box after box trying to find the fabric I am looking to use.  I will have it right at my finger tips.  More time to play and sew if I spend less time fiddling around with finding stuff.

Welcome to my Dungeon:

Southeast wall.  Non-cottons. And miscellaneous crap on my table.

South wall.  Cottons, mostly. And a lovely view of the shit I have on my table.

South wall, more cottons and more crap.

South wall, even more cottons and some more shit.

Not all my fabric is in neat yards or fat quarters, I have strips, strips and more strips.  For these I have implemented the Bonnie Hunter Scrap User's System organised these otherwise unruly bits of cotton into four different widths (see the blue lidded boxes on the middle shelves) which will be sorted into shoe boxes by size and colour.  Odd sized scraps will be dealt with when I get there (the maroon/purple lidded box on top).  One must first learn to crawl before one can run!  :)

Progress!  You can actually see where this is going!
 In addition to cottons, and non cottons, I have fleece.  All of it.  Seriously, I have a major fleece problem, scratch that HAD a major fleece problem.  I am slowly weeding through my fleece and getting it used up.  It takes time which I have precious little of these days, but I do have a wonderful working system based loosely on Bonnie Hunter's Scrap User's System.  This has proven to be quite effective in taming the fleece beast. 

Yard and yard plus lengths are hung on hangers in the Fleece Closet.  Anything less than a yard is started on The Process, with each stage using the remaining material from the previous cut.  It's a great way to get the most out of my fleece investment and at $9+ a yard, I'd better be getting my investment's worth!
Ponoe Pads
Buoys
6" squares
Mice/Wedgies
Tails/Fins

after all this the leftovers are pretty much confetti.  This confetti and the cotton I just can't bear to throw these slivers away even tho I can't use thems are going to become filler for pet beds.  I have some horrible polyesters in patterns that would make you seasick lurking in the Non Cotton Boxes and I just can't bare to throw it away, so they will be used for a good purpose.  Waste not, want not as I am often heard to say when it comes to my hobbies.

My hope is to have this Sewing Dungeon in working order by the end of the coming year, if I am lucky perhaps I can manage to get The Studio and The Lab organised as well. 

I just have to remember that in order to eat an elephant you must take one bite at a time.  CHOMP!

Peach Out Apricots!
heart, Morg

Tuesday, November 13, 2012

And now for something completely different...

Hmm.

Wow, I guess I have been absent for some time dear readers.  I have been doing some quilting, but not nearly enough these past months.  I will be posting pictures of quilts that have managed to be completed and some projects I have been working on.

Let's see what all has been going on since my last post...
Hmm, I think I've managed to get three or four baby quilts completed before I finally got busted for stitching at work and pretty much forced to stop doing the one thing that keeps me sane at my job.  Another reason for my long absence and short trip to the funny farm.  I did manage to complete my EPIC first quilt, "The Zoo."  I will be documenting that whole odyssey in a series of posts in the coming year.  I am now working on a second Stig quilt, repairing a Double Wedding Ring, waiting for the details of an order to be completed and am currently working on christmas gifts.  This year they are fleece throws with braided edges.  I am starting to think I might have to take up crochet...stop me before I craft again!

2013 is going to be dedicated to continuing my quest to get my Sewing Dungeon organised.  The work that was completed earlier in the process is holding steady and is proving to make projects easier to start and finish.  This is a great reinforcement for the groundwork that has already been started. 

A few weeks ago I was out with my partner in quilted crime and we stopped by a new quilt shop in Sioux Falls.  At first I looked around at the expensive pattern/idea books, drooled over the many bolts of cotton, commented about the lovely selection of batiks, asked about jelly rolls, lollypops, cakes, charms and then I saw it...

THE LONG ARM QUILTING MACHINE!

I was drawn like a shy moth to an irresistable flame.  I stood and watched, mesmerised by the rhythmic staccato of the needle as it propelled itself across the cotton field with a "look ma, no hands" carefree motion.  I looked like one of the lobotomised patients in One Flew Over the Cuckoo's Nest.  I couldn't look away.  Finally my friend wrested me from my haze and I was able to ask the machine's handler all manner of questions.  While do not recall the name of the machine, just that it was fully computerised and with very little interaction - only to change the bobbin and make sure it didn't experience any problems with the quilting process.  Seventeen five and it too could come to live at your house.  Holy crap!  I didn't spend that much on my first (only) mobile home or my car!  That's almost what I make a year!  After I recovered from the price tag shell shock I realised I was hooked.  This would be something I could do when I grew up.  Something I could do and enjoy and even potentially make some money at...hmmm.  The wheels in my head started to turn.

Since that day I have asked other people who operated Long Arm Quilting Machines and looked into various priced machines, read reviews and have started to look at what's out there.  While I like the idea of a computerised machine so I can still hand quilt while the Beast is knocking out a quilt, I may not be able to afford that much luxury.  No matter, I will teach myself machine quilting and will (ab)use any and all domestic machines at my disposal to this end.  I can MacGyver that which I need, done it before, will do it again (and again and again!). 

So many things to quilt, so little time.

Peach out, Apricots.

Thursday, April 5, 2012

Sunflowers and Primary Colours

Those crazy braids!
Another creation from my twisted tool box.  By now you should be completely aware of my long term love affair with scrappy quilts.  The uglier the better in my book.  Orgies of incongruent patterns and colour schemes are a delight to my off kilter view of the world.

This quilt is no exception.  Red, Yellow, Blue in a braid of scrappy colour, sashing of a subtle green plaid, bordered by a field of black with Sunflowers, backed with a classic calico of black and white with more sunflowers and bound in basic black to pull the whole riot together in one coherent collection of fabric and thread.

Front View

Back view

Great news!  This fun quilt recently sold and will belong to a new baby coming into the world sometime this fall. 


Vital Stats:
Approximately 45 x 60 inches finished.
Stitch Per Inch:  body 8, binding 4
Batting Type: Cotton/Poly Unknown brand
Binding: pre-purchased
Fabric: Scraps from lots of different places, lots of different sources.

Wednesday, March 21, 2012

We be Stitchin'!

As part of my never (ever) ending quest to improve my abilities and quilting experience I am evaluating my stitching technique.  I never really gave it much thought until I started reading about stab stitching.  I like the sound of it and it sounds like fun, so I started to explore and see what all the fun was about and realised I already do a little bit of stab stitching.  I also rock, gather, pinch and pull.

It appears that my personal stitching style is a mash-up of several techniques.  I am not sure what to call it, Stab-Rock-Pinch-Pull or Rock'n Pull or Pinch'n Stab?   I dunno. 

I would like to learn to properly Stab Stitch, and perhaps I can work on my technique as the results are really quite nice, I could even improve my "understitches" that way.

Some say...

What could possibly go wrong?  Famous last words often heard on BBC's smash hit Top Gear, and while hand stitching this fun quilt. 
can't...leave...quilting...top...gear...
 First off, the top is a duvet cover made of one thread count.  The bottom, a length of cotton, is of another thread count.  I know the rules about using sheets for backing or in this case tops of quilts, but that has never stopped me in the past, and it will not stop me in this case either. 

While obtaining the batting and backing from the fabric store we were giving stink eye was given when it was revealed that this quilt was half sheet and half cotton quilting fabric with a cotton batting.  The lady with the scissors was very helpful in reminding us that sheets were not meant for quilitng.  Uh hunh and just tell Jezza, James and Richard that they can't use whatever they damn well please to make a car or a quilt or even a caravan.   The Stig would not have been amused. Nor was I.

Rules, like traffic signs are only suggestions unless there's a cop around.  <wink wink>

I am familiar enough with the properties of cotton broadcloth as well as the quirkiness of sheet fabric.  I understand the different shrinking rates of fabrics and take that into consideration.  As it is I am a rebel and do not prewash or pretreat (short of ironing) my fabric as that handmade dorky look is what I am trying to achieve with my stitching magic.

Binding detail
When quilting a panel, which this quilt essentially is, it tends to take a special bit of planning particularly in terms of batting, stitch length, detail and open spaces.  I like to really get intricate with the detail on panels as there isn't a lot of filler I am willing to do by hand.  If I was machine quilting, I could fill in the open areas with squiggles and other stuff also called "stippling." 

I prefer instead to stitch around the highlighted areas - namely the printed bits and leave the rest open.  Warm and Natural allows for stitches to be up to a massive 10" apart.  I'm not sure I believe this claim, but rather than quilt, er court disaster I am making sure there are less than 10" spaces of clear and unstitched areas between the quilted bits. 
    
Stig Approved.


 Vital Stats:
Approximately 43 x 70 inches finished.
Stitch Per Inch: 8 spi body of quilt and 4spi on binding.
 Batting Type: Cotton - Warm and Natural brand
Binding: pre-purchased
Fabric: Front-Top Gear duvet, Back-cotton broadcloth


Friday, February 10, 2012

What's in your sewing box? A visual guide to my portable sewing kit. (graphic intensive)

Like the crazy commercials from Capital One asking, "What's in you wallet?"  I am posing the question, "What's in your sewing box?"  Myself I keep only the essentials.  This is primarily because my sewing kit is a little butter cookie tin from the Dollar Tree.  Not a tremendous amount of extra stuff can go in there.  The contents are as follows, thimbles, thumbles, strawberry, finger guards, scissors, needle case, thread heaven, wax and a spool of thread for the project I am currently working on.
Meet my sewing box.
The various thimbles, thumbles and finger protectors shown here are a pared down pile of what had been in the box.  I have accumulated a small petting zoo of thimbles and thumbles in my quest to find the right tools for my trade.  These are but a few of my current working selection.
Thimbles, thumbles, finger and nail protectors.

My newest creation is a copper plate embedded into a tube of leather sewn to fit my middle finger.  Necessity being the mother of invention and all, I am pretty notorious for creating my own thimbles.  I will have to write a blog showing off my various creations.  This finger guard came into being from the constant wear and tear on my middle fingernail.  Chips, grooves, breaks...enough is enough.  I have been trying to work on something like this for a while.  I am always looking for a way to improve not only my stitch consistency but to maintain my fingernails.  This is the 3rd generation of the design.  Success at last.

Handmade nail protector.

The brass Clover finger tip thimble has got to be, hands down, my favourite thimble of all the thimbles I have accumulated.  I have one from Dritz, but it doesn't have the same feel or fit as the Clover. This style is not only perfect for protection, but it makes it easy to push the needle through the quilting materials.  I did have to do a little adjustment in that I added a leather fitting to prevent rubbing and blistering of my finger when I wear this lovely thimble.  Due to the way the tines were bent it rubs on my ring finger and I cannot stand to have the edge of it rubbing on the tender skin of my medial joint.
Augmented thimble and finger protector.
This picture shows how the edge rubs against the velcro pad.  Funny thing about this pad, I created it from a velcro tie designed for taming cords.  A little trimming, a little shaping and viola!  It is always a perfect fit as it is completely adjustable.
How the finger protector works.

Meet my thumble.  It's actually a leather coin thimble that I removed the coin, the coin holder, turned inside out, reinforced the stitching and added a little cuff to fit more comfortably on my gigantic thumb.  I don't use this thing quite as much as I did when I first needed to make it.  Initially, when I began my quilting journey my thumb pad had not yet developed a callous.  Raw, sore, miserable, my thumb was in terrible shape, so I decided to scrap out a coin thimble and make my own thumble.  I still use it when I am power quilting, working leather or my callous peels off - which it does about once a year or whenever I go longer than about 10 days without quilting.  I am currently growing a new thumb callous as mine peeled off first part of January...no fun for me.
Leather thumble.

As you can see when I am all geared up I can quilt the world!  Since I started quilting I have noticed that my thumb has become HUGE compared to my under hand.  This picture makes my fingers look all short and pudgy, they are actually normal sized - except for my giant thumb.  LOL.

My Quiltin' Hand.  Look at the size of my thumb! 
 These are my thumb thimbles.  I discovered them at one of my favourite quilt shoppes, this one is in Hastings, Nebraska called the Plum Nelly.  It is a combination bead, fiber and quilt shop.  A fantastic place. 
Extra thumbles.
Meet my snippers.  I have no idea where these little scissors came from, I just know that they have been around for years.  I hope one day to have my maternal grandma's sewing scissors, but for now they are safe in my mum's type tray on proud display.
My trusty little random thread snippers.

Who could resist such a cute little tin?  I couldn't.  I put thin, adhesive magnets on both the bottom and top of the tin so my needles would stay in place.  I keep a stash of sharps (and dulls) as well as the random embroidery needle for those "you never know" occasions.   This little tin is great for stashing extra threads and pieces of things I do not want to lose (like my mind?).
Needle case (holds threads too).

Meet my fuzzy strawberry.  This poor thing has been through the wringer.  I am not sure how old it is, but I have had it for quite some time.  The tomato has long since been pressed into duty in other realms of my sewing life.  Mostly to hold my bigger needles and pins.  My faithful little strawberry holds my working needles, sharpens my tips and generally hangs around and keeps the other equipment company.
The under appreciated strawberry.

Thread Heaven is heavenly!  It's like a weird globule of rubberised silicone.  I use my little glob to lube up my thread and it pulls through like a dream.  Less tangle, less breakage, which is nice.  I used to use beeswax, but since I discovered this stuff, I haven't even picked up my waxcake.
Thread Heaven.

This is my Thimble tin.  I keep my extra thimbles, thumbles, spare thread, pins, and whatever else I do not want to see lost in my sewing kit.  I had to put a leather band around it to keep the lid from coming off.  :) 
Thimble and Thumble House.

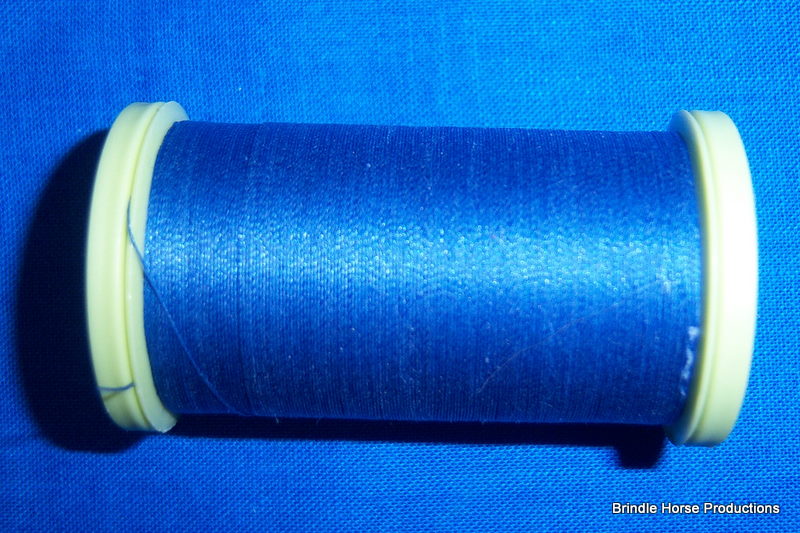
And last but least, a spool of thread from my current quilting project.  The colours, thickness and type may vary, but there is always at least one spool in the tin.
The spool for my current project.


All in one box.
And that, dear readers is my sewing kit.

Peach Out Apricots!
Morg